Thursday, March 23, 2017

Woodland Box Card

Good Morning Scrapping Cottage Fans!

It is Pam sharing with you today!  I really love the Cottage Cutz dies. They are extremely detailed and make such sharp wonderful cuts!  I love to create little scenes so I am sharing a A2 size box card with you today.

Here are my design steps:
Start with a 5 1/2 x 9 inch piece of kraft card stock.  Score with paper placed horizontally on the scoreboard at 2 1/8, 4 1/4, 6 3/8, and 8 1/2.  Then flip card stock vertically on the scoreboard and score at 2 3/4
 On the top half of the card cut down to the center line and stop. On the bottom half on the 1/2 inch score line make a diagonal cut all the way to the top and remove that piece as shown
Green mats (2 Pieces) 2 x 5 3/8 glue the mats to the card closest to the 1/2 flap on the front and the back. These pieces of the box will not bend

Cut the green mats for the rest of the box (9 pieces) 2 x 2 5/8. Glue the green mats to the outside of the box as shown below
 Glue the rest of the green mats to the inside of the box as shown below. The bottom that is not covered is the inside of the box which will not be seen
 Cut one piece with white card stock 1 7/8 x 5 1/4 for the outside of the box and glue down.  This is where you will stamp your sentiment and sign your name. You should do your stamping and signing now because it is much easy at this point
 Cut one piece of designer paper 1 7/8 x 5 1/4 for the inside of the box and glue down
 Cut designer paper (3 pieces) 1 7/8 x 2 1/2 glue to the inside of the box
 Cut different designer paper (6 pieces) 1 7/8 x 2 1/2 glue to the outside of the box
 Using a sturdy tape place several pieces of tape to the small flap and close up the box.  Make sure that you have the side of all the rectangles covered with designer paper on the outside of the box


 Cut (2 pieces) of kraft card stock 3 x 1 score them on each end 1/2.  Fold them and add sturdy tape to each folded end as shown below
 Place the first brace toward the front of the box as show making sure to really press down the tape
 Place the second brace about an 1 1/4 behind the first brace as shown
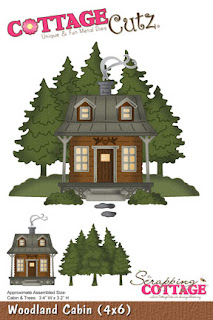
Using the following dies: Rustic Sign and Trees for the big darker green tree and bunny, Woodland Cabin for the ground, trees in the background, Garden Accessories for the fence, vines, and flowers, -Seasons Greetings for the deer, Thanks for the sentiment.  I inked many of the pieces for some added depth.

 To begin assembling I glued down 4 pieces of ground for all of the braces and the front and back, then the background trees, added the dark green tree and the deer to the back brace, next I added the fence to the front brace, the bunny and all of the yellow tulips and last I added the vine with the red flowers.


For the final touch I added the Thanks and the raffia bow!


I hope you enjoyed looking at this little woodland scene!  It was really fun to create. Give it to someone special. They will love receiving this awesome surprise!

Blessings
Pam

Wednesday, March 22, 2017

CottageCutz Daffodil Flower - March


Welcome!  This is Beverly Polen from Guneaux Designs and I am a guest designer today for the Scrapping Cottage.  I have for you a project featuring the CottageCutz Daffodil Flower - March stamp and coordinating die set.

Speaking of March, did you know that the month of March is synonymous with the onset of spring in the Northern Hemisphere?  Accordingly, the flower associated with the month of March is the Daffodil.  There is a flower for each month of the year, and Scrapping Cottage has a stamp and coordinating die for the flower of each month.  Check out these beautiful stamps and dies here.

Moving on, here is the card I made with the beautiful CottageCutz Daffodil Flower stamp.


My Daffodil is designed after the Fortissimo Daffodil that has yellow petals and a cup of glowing orange to red.  Here is a picture of the flower.


The card I made is called a "Big Flap" card, and you can make this card by following these instructions:

Step 1.  Stamp the CottageCutz Daffodil Flower onto a piece of white card stock.  I wanted a "no-line coloring" image; therefore, I used different colors of markers to add ink to different sections of the image and stamped them separately.  I used yellow for the petals of the Daffodil, peach for its cup, green for its leaves and stems, and gray for the rocks.


Step 2.  Color the image as desired.  I used various Copic Sketch Markers to color my image.  After coloring the image, I used the two largest dies from the CottageCutz Stitched Rounded Rectangle Set to cut out the image.  Also, I stamped, colored, fussy cut, and attached the butterfly that is part of the CuttageCutz Daffodil Flower - March set to the image using double-sided foam tape.


Step 3.  Set aside the image and start creating the card base.

Step 4.  Cut a 5-1/2" x 10" piece of  card stock.

Step 5.  Place the card stock horizontally onto a score board and score at the 4" and 8-1/4" marks.


Step 6.  Fold the score lines toward each other.


Step 7.  Select a double-sided designer paper and cut two 3-3/4" x 5-1/4" pieces, and two 1-1/2" x 5-1/4" pieces.


Step 8.  Attach one of the 3-3/4" x 5-1/4" pieces of designer paper to the larger flap on the front of the card base.

Step 9.  Attach one of the 1-1/2" x 5-1/4" pieces of designer paper to the small flap on the front of the card base.  (I selected the same side of the designer paper for the front.)


Step 10.  Attach the second 3-3/4" x 5-1/4" piece of designer paper onto the inside large flap.  I used the other side of the designer paper.

Step 11.  Attach the second 1-1/2" x 5-1/4" piece of designer paper onto the inside small flap.


Step 12.  Cut a piece of white card stock using the largest die from the CottageCutz Stitched Rounded Rectangle Set.

Step 13.  Attach the outside frame cut from the image (see Step 2.) to the piece of white card stock using a double layer of double-sided foam tape.


Step 14.  Attach the image inside of the above frame.


Step 15.  Apply a strong adhesive to the back left side of the above image piece.

Step 16.  Close both flaps of the card base with the right one over the left one.  Attach the framed image to the front large flap of the card base, ensuring it is centered over the front and not attached to the right small flap of the card.  The strong adhesive is necessary to ensure the image piece will not come off as the card is opened and closed.


Step 17.  Cut a 4" x 5-1/4" piece of white card stock, add a sentiment and/or an embellishment, and attach to the center of the inside of the card.


Step 18.  Embellish the card as desired.  I cut several small flowers using the CottageCutz Tree of Nature Die.  I cupped them with a stylus and adhered micro beads to the centers.  I used the CottageCutz Winter Branches Die to cut green stems (not branches - LOL) for the tiny flowers and added them to the two corners of my card front and the center piece inside of the card.


I hope you are inspired by my CottageCutz Daffodil Flower card.  Come back tomorrow to see another project that is created with CottageCutz Dies!

CottageCutz Dies Used:


Tuesday, March 21, 2017

Happy Easter

Hi, Janja here!

Today I share with you two Easter cards created with Spring CottageCutz collection of dies.


Supplies:
- CottageCutz dies: Easter bunny & chicks, spring bunny with flowers, build an Easter egg, stitched circle set
- white cardstock for card base
- patterned paper
- white and colored cardstock
- Distress ink pad Spiced Marmalade
- Color Box pigment ink pad Frost White

Cut a circle with the largest die from the stitched circle set.
For card base, fold cardstock in half. Mount the die on cardstock, so that the upper part is slightly sticking out over the edge and cut. Glue circles to each other to obtain an easel card base.


From patterned paper also cut out two circles. Use eighth die in a row from the middle of the set. Stamp sentiment Happy Easter.


Cut out Easter bunny with chicks. Shadow all elements and compose them.


Attach patterned paper on white card base. To finish the card, attach all the elements as shown to a card base using foam pads.


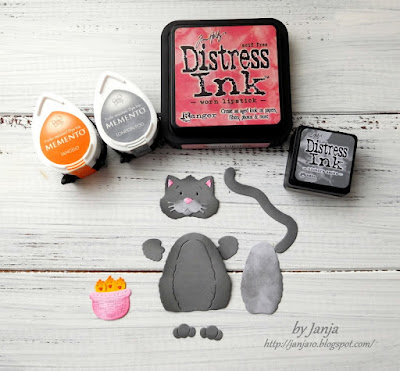
On another card with kitty I added some Easter eggs. 


Supplies:
- white card base: 4.25 x 5.5" (10,8 x 14 cm), folded
- patterned paper: 4 x 5 " (10,2 x 13,2 cm) 
- white and colored cardstock 

Shadow cutouts. 


Completed card.


Thank you for coming over. Have a nice day.